Linking Dashboards
The Reveal SDK supports dashboard linking, which allows users to navigate through dashboards. By moving from dashboard to dashboard, you can go from a high level overview of the business' reality to a more detailed view with the specifics.
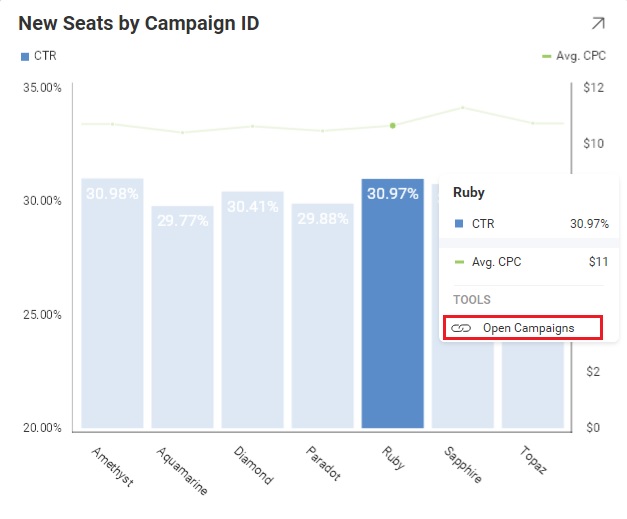
From a Reveal SDK perspective, dashboard linking is invoked when an end-user clicks on a link in a visualization which invokes the loading of another dashboard.
Creating Dashboard Links
Dashboard links are created in the visualization editor by clicking the "+" button in the Links section of the Settings tab.

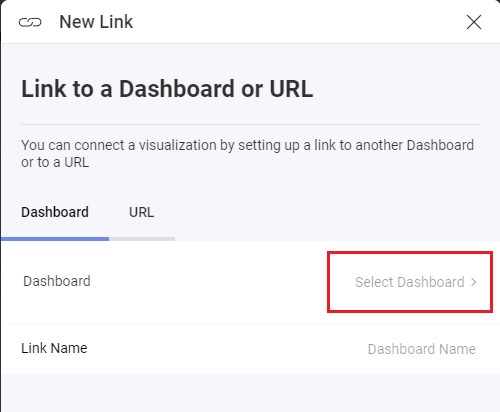
When this button is clicked, a dialog is shown which gives the end-user the ability to choose a dashboard. A dashboard selection dialog is shown when the Select Dashboard item is clicked.
At this point, it is now the responsibility of the developer to create a custom user interface that showcases the range of available dashboards that users can choose from. To facilitate this process, the Reveal SDK features an onDashboardSelectorRequested event that serves as a trigger for displaying the customized UI. Within this event, the event arguments contain a callback function that delivers the unique id of the selected dashboard, linking it back to the SDK.
revealView.onDashboardSelectorRequested = (args) => {
    //todo: show dialog to list dashboards and set the selected dashboardId

    //invoke the callback with the dashboardId selected in the custom dialog
    args.callback(dashboardId);
}
When the dashboard is selected from the custom UI, the next step is to instruct the SDK on how to load the linked dashboard. For this, the SDK provides the onLinkedDashboardProviderAsync event. In this event, the linked dashboard instance should be returned.
revealView.onLinkedDashboardProviderAsync = (dashboardId, title) => {
    return RVDashboard.loadDashboard(dashboardId);
};
The onLinkedDashboardProviderAsync event is also invoked when the Dashboard Link is clicked within the tooltip of a visualization.
Example: Dashboard Linking
This is a high-level example of the steps required to implement a custom dashboard selection UI for adding dashboard links. For full source code of the working example, see the GitHub link at the end of the sample.
1 - In the server application, expose a service endpoint which returns the names of all the available dashboards to display in the custom UI.
- ASP.NET
- Java
- Node.js
app.MapGet("dashboards", () =>
{
    // Get the file path for the dashboards
    var filePath = Path.Combine(Environment.CurrentDirectory, "Dashboards");

    // Get the names of all files in the directory
    var files = Directory.GetFiles(filePath);

    //return just the dashboard file names
    return files.Select(x => Path.GetFileNameWithoutExtension(x));
});
@Component
@Path("dashboards/")
public class RevealDashboardController {

    @GET
    @Produces(MediaType.APPLICATION_JSON)
    public List<String> getFileNamesWithoutExtension() {
        List<String> filenames = new ArrayList<String>();
        File directory = new File("dashboards");
        File[] files = directory.listFiles();

        for (File file : files) {
            String fileNameWithExtension = file.getName();
            String fileNameWithoutExtension = fileNameWithExtension.substring(0, fileNameWithExtension.lastIndexOf("."));
            filenames.add(fileNameWithoutExtension);
        }

        return filenames;
    }
}
app.get("/dashboards/", (req, res) => {
	fs.readdir("dashboards", (err, files) => {
		if (err) {
		  res.status(500).send('Error getting directory information');
		} else {
		  const filenames = files.map((file) => {
			const extension = path.parse(file).ext;
			return file.slice(0, -extension.length);
		  });
		  res.send(filenames);
		}
	  });
});
2 - Create an HTML dialog to use as the custom dashboard selector UI
<dialog id="dbSelector" class="modal">
    <div id="thumbnails"></div>
    <button onclick="closeDialog()">Cancel</button>
</dialog>
3 - Handle the onDashboardSelectorRequested event on the RevealView. In this event, we will call a method responsible for displaying the custom UI. We will pass the callback to the function so it can be used by the custom UI.
revealView.onDashboardSelectorRequested = (args) => {
    openDialog(args.callback);
}
4 - Implement the openDialog function which will get all the dashboard file names from our service endpoint, and then dynamically build a list of dashboards to display in our dialog.
const dialog = document.getElementById("dbSelector");

function openDialog(callback) {
    fetch("http://localhost:5111/dashboards")
        .then(resp => resp.json())
        .then(data => {
            var container = document.querySelector("#thumbnails");
            container.innerHTML = "";

            data.forEach(id => {
                createThumbnail(container, id, callback);
            });

        }).then(() => dialog.showModal());
}

function createThumbnail(container, id, callback) {
    const button = document.createElement("button");
    button.innerHTML = id;
    button.addEventListener('click', (arg) => {
        callback(id);
        closeDialog();
    });
    button.className = "Reveal-Thumbnail-Box";
    container.appendChild(button);
}

function closeDialog() {
    dialog.close();
}
5 - Handle the onLinkedDashboardProviderAsync event to load the linked dashboards.
revealView.onLinkedDashboardProviderAsync = (dashboardId, title) => {
    return RVDashboard.loadDashboard(dashboardId);
};
The source code to this sample can be found on GitHub