Getting Started with Reveal SDK
Step 1 - Create a New WPF Project
The steps below describe how to create a new WPF project. If you want to add the Reveal SDK to an existing application, go to Step 2.
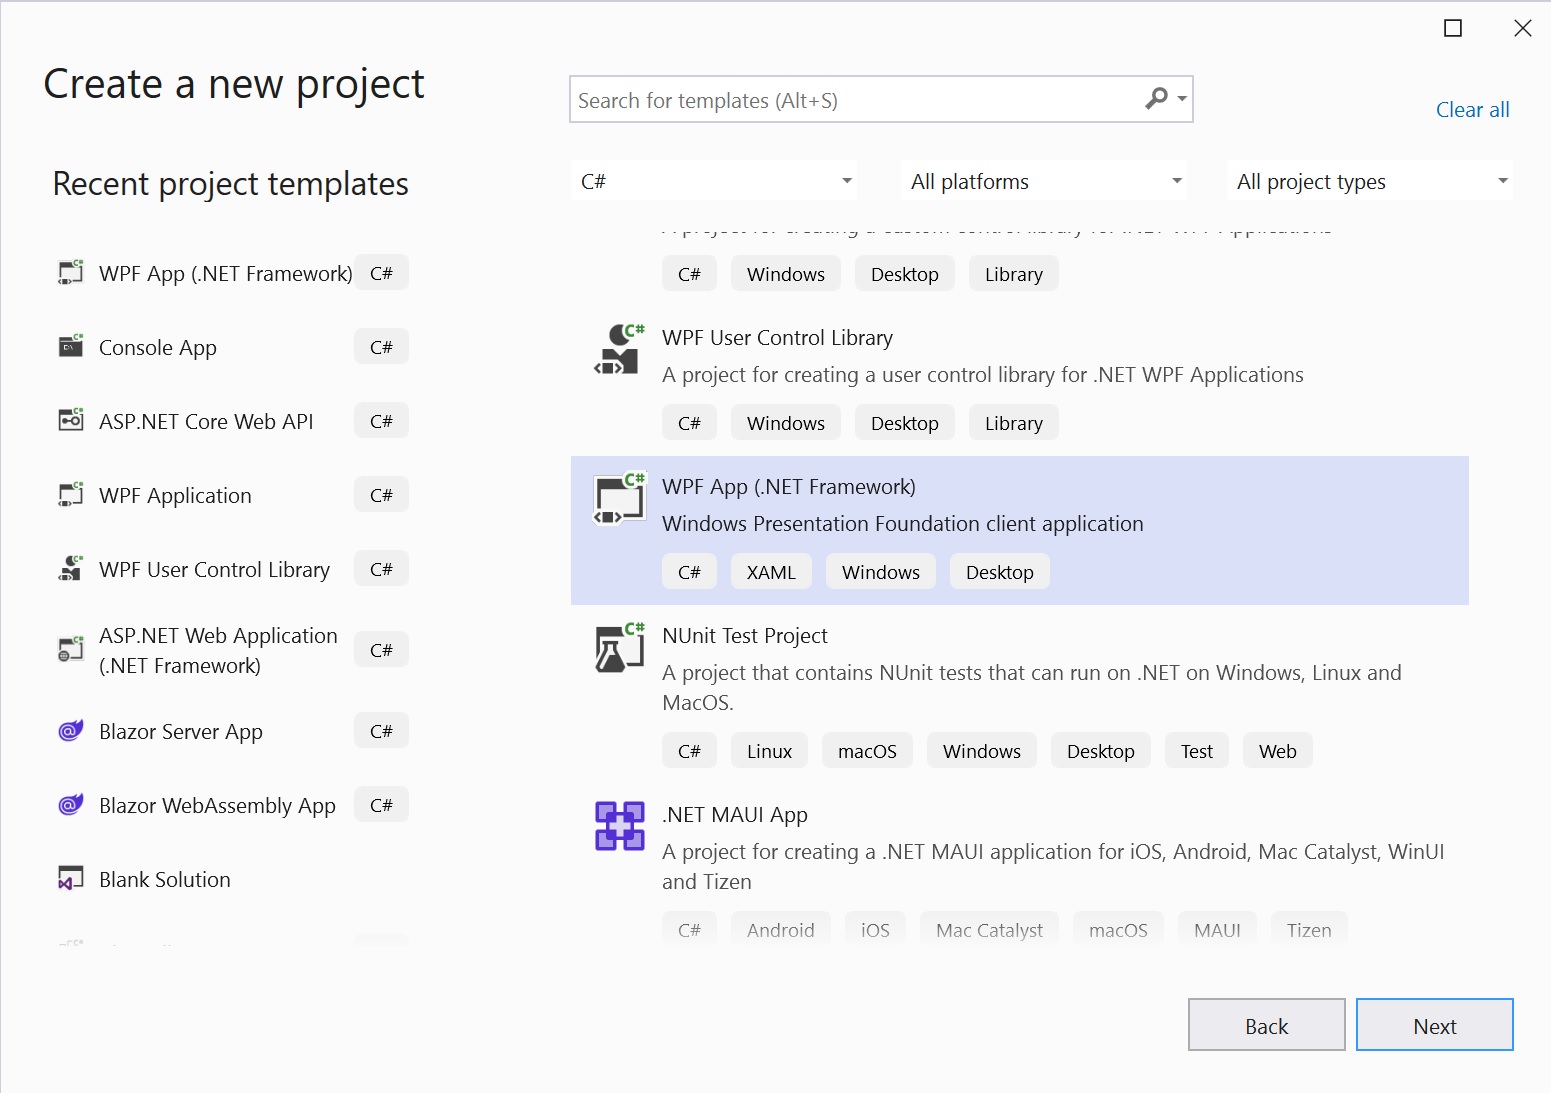
1 - Start Visual Studio and click Create a new project on the start page, select the WPF App (.NET Framework) template, and click Next.
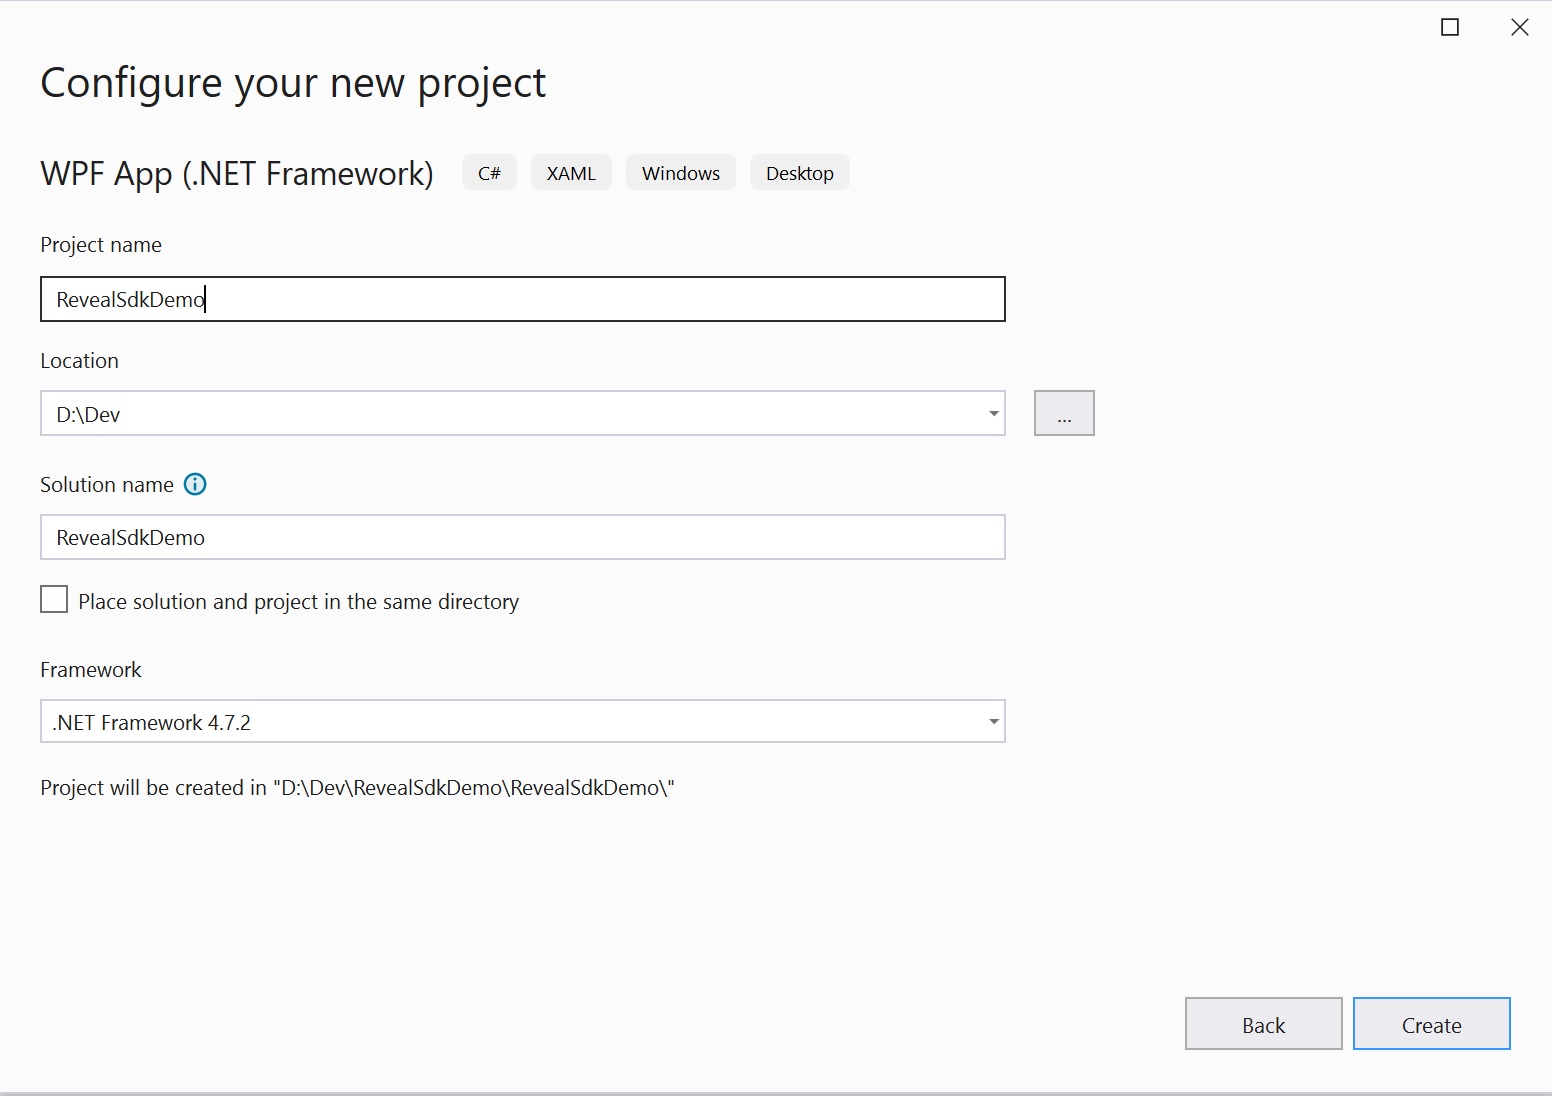
2 - Provide a project name, select .NET Framework 4.6.2 or higher, and click Create.
Step 2 - Add Reveal SDK
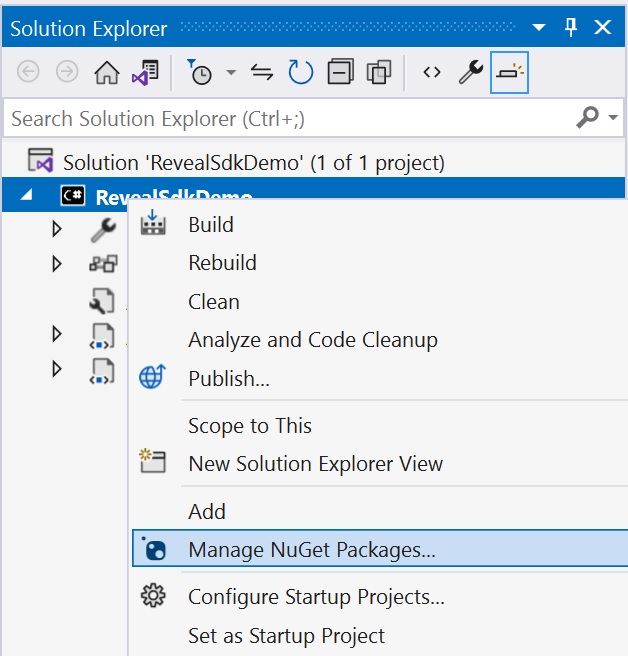
1 - Right click the Solution, or Project, and select Manage NuGet Packages for Solution.
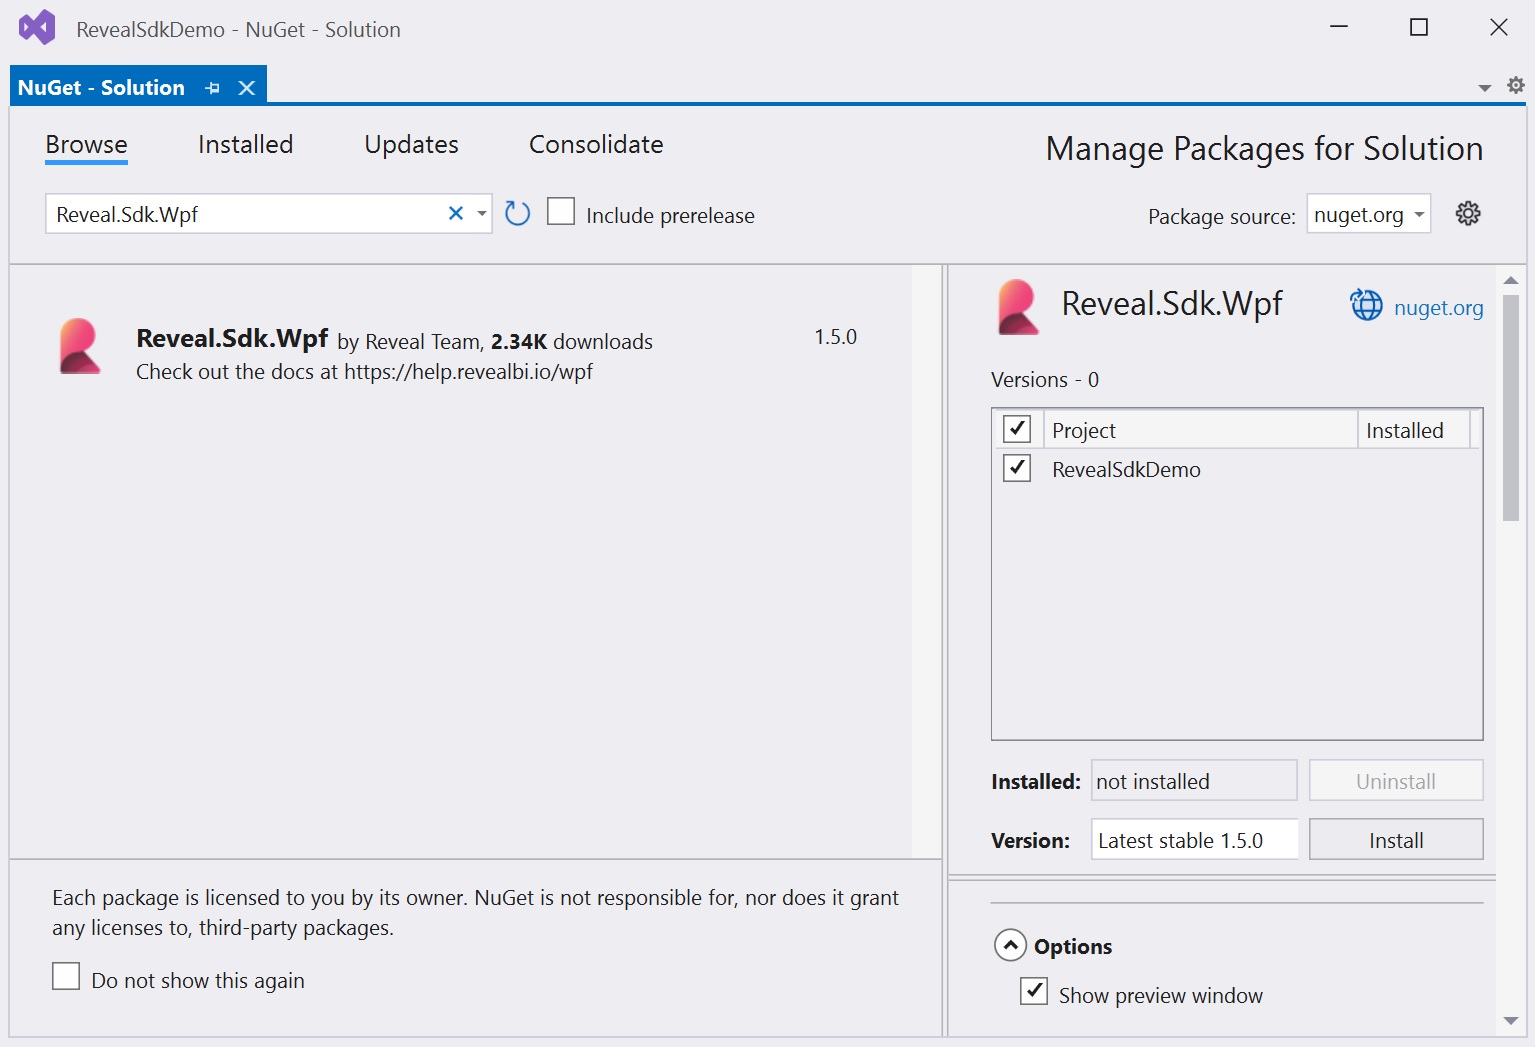
2 - In the package manager dialog, open the Browse tab, and install the Reveal.Sdk.Wpf NuGet package into the project.
Step 3 - Add RevealView Control
Using XAML
1 - Open the MainWindow.xaml file and add the xmlns:rv="http://revealbi.io/" namespace
xmlns:rv="http://revealbi.io/"
2 - Add the RevealView to the content of the MainWindow
<rv:RevealView />
Using the Toolbox
1 - Open the MainWindow.xaml file
2 - Open the Visual Studio Toolbox and find the RevealView control under the Reveal SDK toolbox tab
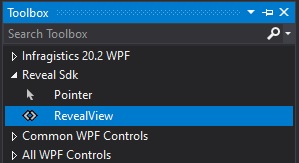
3 - Click and drag the RevealView control onto the design surface of the MainWindow.xaml file. The Reveal SDK namespace and the RevealView control will both be added to the MainWindow.xaml file.

Step 4 - Run Application
Press F5 to run the application.
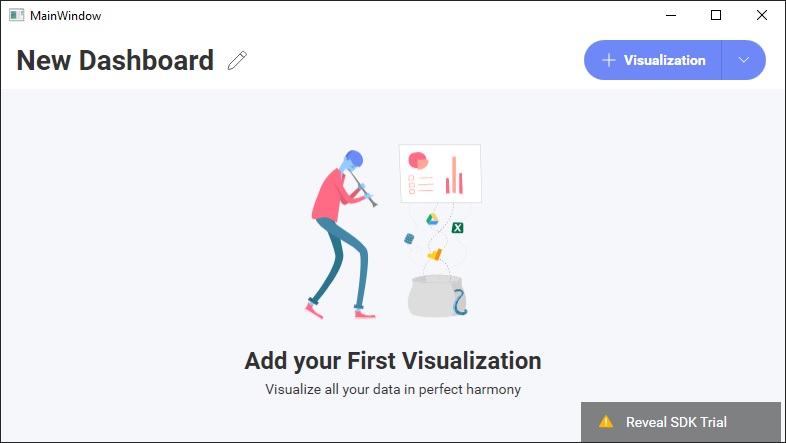
Congratulations! You have written your first Reveal SDK application.
Next Steps:
The source code to this sample can be found on GitHub.