Node.js と TypeScript を使用して Reveal SDK サーバーをセットアップする
手順 1 - Node.js プロジェクトの作成
1 - コマンドラインを開き、reveal-server-node という名前のディレクトリを作成します。
mkdir reveal-server-node
2 - コマンドライン パスを新しく作成したディレクトリに変更します。
cd reveal-server-node
3 - ディレクトリで npm を初期化します。
- npm
- Yarn
- pnpm
- Bun
npm init -y
yarn init -y
pnpm init -y
bun init -y
4 - express フレームワークをインストールします。
- npm
- Yarn
- pnpm
- Bun
npm install express
yarn add express
pnpm add express
bun add express
5 - TypeScript およびその他のパッケージ タイプをインストールします。
- npm
- Yarn
- pnpm
- Bun
npm install typescript @types/node @types/express @types/cors --save-dev
yarn add typescript @types/node @types/express @types/cors --dev
pnpm add typescript @types/node @types/express @types/cors --save-dev
bun add typescript @types/node @types/express @types/cors --dev
6 - Nodemon および ts-node パッケージをインストールします。
- npm
- Yarn
- pnpm
- Bun
npm install nodemon ts-node --save-dev
yarn add nodemon ts-node --dev
pnpm add nodemon ts-node --save-dev
bun add nodemon ts-node --dev
7 - TypeScript を構成します。この例では、ルート ディレクトリを「src」に、出力ディレクトリを「dist」に設定しています。
npx tsc --init --rootDir src --outDir dist
8 - VS Code でプロジェクトを開きます。
code .
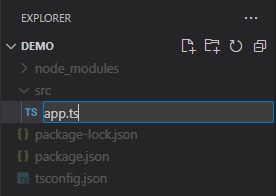
9 - src というディレクトリに app.ts という名前の新しいファイルを作成します。
次の��コードを追加します:
import express, { Application } from 'express';

const app: Application = express();

app.listen(5111, () => {
	console.log(`Reveal server accepting http requests`);
});
手順 2 - Reveal SDK の追加
1 - Node.js 用の Reveal SDK をインストールします。
- npm
- Yarn
- pnpm
- Bun
npm install reveal-sdk-node
yarn add reveal-sdk-node
pnpm add reveal-sdk-node
bun add reveal-sdk-node
2 - app.ts ファイルを変更して Reveal を追加します。
import express, { Application } from 'express';
import reveal from 'reveal-sdk-node';

const app: Application = express();

app.use("/", reveal());

app.listen(5111, () => {
	console.log(`Reveal server accepting http requests`);
});
手順 3 - ダッシュボード フォルダーの作成
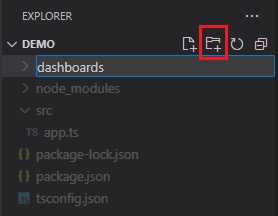
1 - Visual Studio Code で、エクスプローラーの [新しいフォルダー] ボタンをクリックし、dashboards という名前を付けます。フォルダーは dashboards という名��前で、アプリケーションの作業ディレクトリに作成する必要があります。
デフォルトで、Reveal SDK は dashboards フォルダーからすべてのダッシュボードを読み込む規則を使用します。この規則を変更でするにはカスタムの IRVDashboardProvider を作成します。
手順 4 - CORS ポリシー (デバッグ) の設定
アプリケーションの開発とデバッグでは、サーバーとクライアント アプリを異なる URL でホストするのが一般的です。たとえば、サーバーは https://localhost:24519 で実行されますが、Angular アプリは https://localhost:4200 で実行されます。クライアント アプリケーションからダッシュボードを読み込もうとすると、Cross-Origin Resource Sharing (CORS) ポリシーが原因で失敗します。このシナリオを有効にするには、CORS ポリシーを作成し、サーバー プロジェクトで有効にする必要があります。
1 - cors パッケージと TypeScript 型をインストールします。
- npm
- Yarn
- pnpm
- Bun
npm install cors
npm install @types/cors --save-dev
yarn add cors
yarn add @types/cors --dev
pnpm add cors
pnpm add @types/cors --save-dev
bun add cors
bun add @types/cors --dev
2 - app.ts ファイルを変更して cors を有効にします。
import express, { Application } from 'express';
import reveal from 'reveal-sdk-node';
import cors from "cors";

const app: Application = express();

app.use(cors());

app.use("/", reveal());

app.listen(5111, () => {
	console.log(`Reveal server accepting http requests`);
});
手順 5 - Node.js サーバーの起動
最後の手順は、次のコマンドを実行して Node.js サーバーを起動することです。
npx nodemon src/app.ts
必要に応じて、次のスクリプトを package.json ファイルに追加�できます。
"scripts": {
  "start": "node dist/app.js", //runs the app.js file in the dist folder that was generated from the build script
  "dev": "npx nodemon src/app.ts", //runs the server and watches for changes during development
  "build": "tsc -p .", //builds the app and generates javascript files in the dist folder
},
次に、開発中に dev スクリプトを実行します。
- npm
- Yarn
- pnpm
- Bun
npm run dev
yarn dev
pnpm run dev
bun run dev
このサンプルのソース コードは GitHub にあります。