Setting up the Reveal SDK Server with ASP.NET
Step 1 - Create a New ASP.NET Core Web API
The steps below describe how to create a new ASP.NET Core Web API project. If you want to add the Reveal SDK to an existing application, go to Step 2.
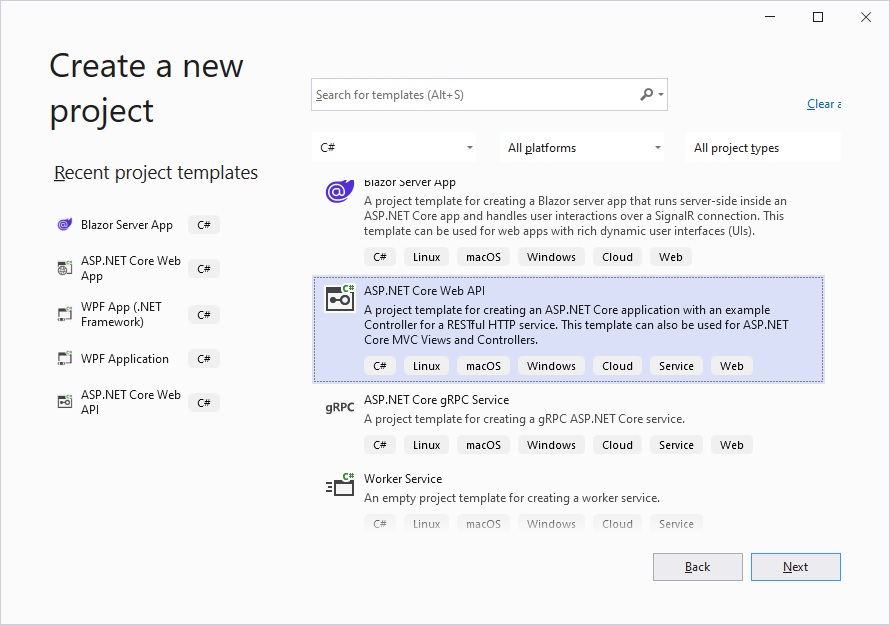
1 - Start Visual Studio and click Create a new project on the start page, select the ASP.NET Core Web API template, and click Next.
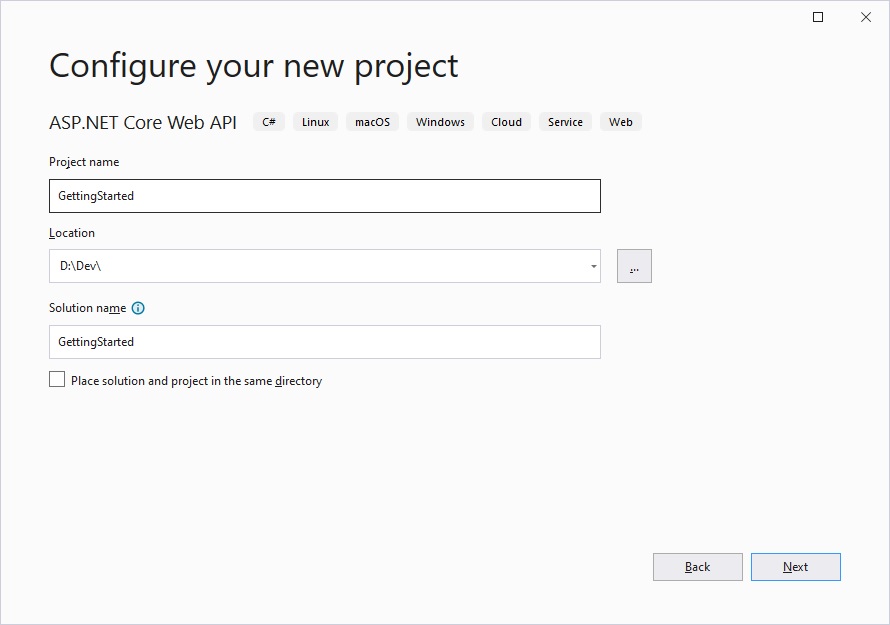
2 - Provide a project name and set the location to the server directory we created earlier, and click Next.
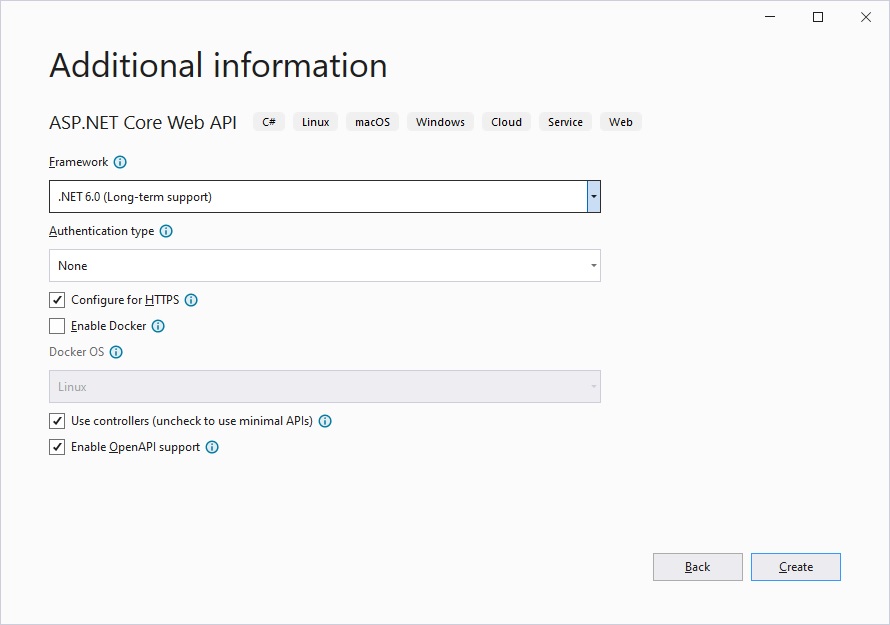
3 - Choose your framework, authentication type, and Docker options, and then click Create.
Step 2 - Add Reveal SDK
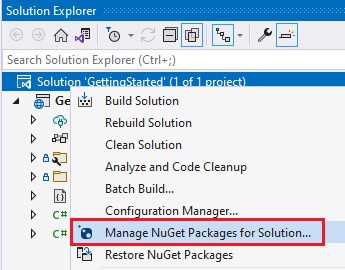
1 - Right click the Solution, or Project, and select Manage NuGet Packages for Solution.
2 - In the package manager dialog, open the Browse tab, select the Infragistics (Local) package source, and install the Reveal.Sdk.AspNetCore NuGet package into the project.
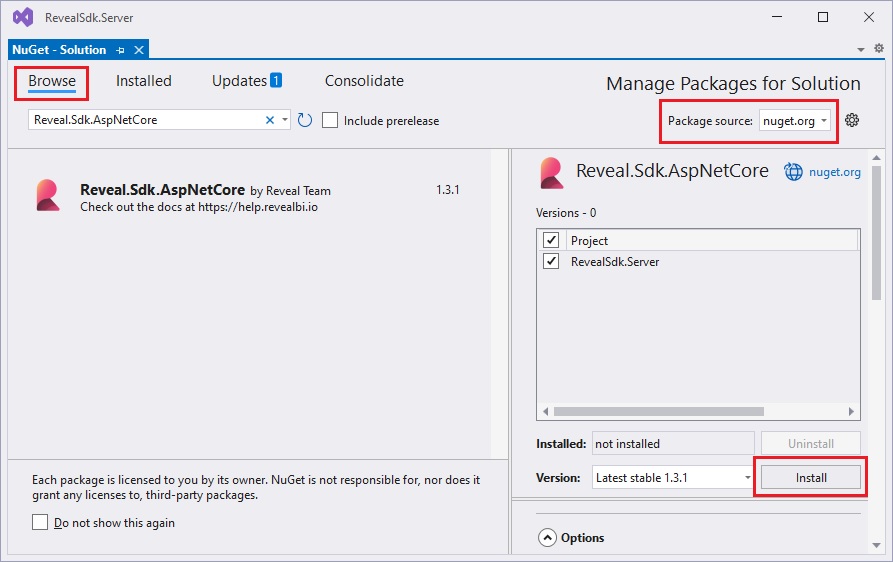
If you are a trial user, you can install the Reveal.Sdk.Web.AspNetCore.Trial NuGet package found on NuGet.org.
3 - Open and modify the Program.cs file to add the namespace using Reveal.Sdk;. Then, add the call to IMcvBuilder.AddReveal() to the existing builder.Services.AddControllers() method as follows:
using Reveal.Sdk;

builder.Services.AddControllers().AddReveal();
Step 3 - Create the Dashboards Folder
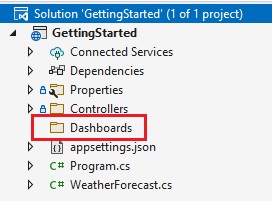
1 - Right-click the project and select Add -> New Folder. The folder MUST be named Dashboards .
By default, the Reveal SDK uses a convention that will load all dashboards from the Dashboards folder. You can change this convention by creating a custom IRVDashboardProvider. You can learn more about this in the Loading Dashboards topic.
Step 4 - Setup CORs Policy (Debugging)
While developing and debugging your application, it is common to host the server and client app on different URLs. For example; your Server my be running on https://localhost:24519, while your Angular app may be running on https://localhost:4200. If you were to try and load a dashboard from the client application, it would fail because of ASP.NET Core's Cross-Origin Requests (CORs) security policy. To enable this scenario, you must create a CORs policy and enable it in the server project.
1 - Open and modify the Program.cs file to create a CORs policy which will allow any origin (url) access to any headers and methods.
builder.Services.AddCors(options =>
{
  options.AddPolicy("AllowAll",
    builder => builder.AllowAnyOrigin().AllowAnyHeader().AllowAnyMethod()
  );
});
2 - Apply the policy only while in debug mode. If you have a production application then you would apply the appropriate policy for your production builds.
if (app.Environment.IsDevelopment())
{
    app.UseCors("AllowAll");
}
It's important to understand the order in which the middleware executes. The UseCors must be called in a specific order. In this example after UseHttpsRedirection() and before UseAuthorization(). For more information, please refer to this Microsoft help topic
The source code to this sample can be found on GitHub.