Adding an MS SQL Server Data Source
Currently, the Reveal SDK is in the process of decoupling the data sources from the Reveal SDK core package. In order to ensure the project's continued functionality, you might be required to install additional packages into your project. Please see the Supported Data Sources topic for more information.
On the Client
Step 1 - Add an event handler for the RevealView.onDataSourcesRequested event.
const revealView = new RevealView("#revealView");
revealView.onDataSourcesRequested = (callback) => {
    //add code here
    callback(new RevealDataSources([], [], false));
};
Step 2 - In the RevealView.onDataSourcesRequested event handler, create a new instance of the RVSqlServerDataSource object. Set the Title property that corresponds to your MS SQL Server. After you have created the RVSqlServerDataSource object, add it to the data sources collection.
revealView.onDataSourcesRequested = (callback) => {
    var sqlDataSource = new RVSqlServerDataSource();
    sqlDataSource.title = "My SQL Server";

    callback(new RevealDataSources([sqlDataSource], [], false));
};
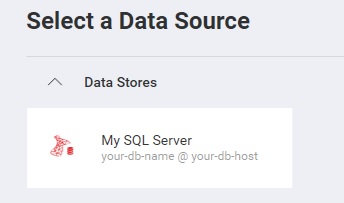
When the application runs, create a new Visualization and you will see the newly created MS SQL Server data source listed in the "Select a Data Source" dialog.
Step 3 - Add a new Data Source Item by creating a new instance of the RVSqlServerDataSourceItem object. Set the Id and Title properties that correspond to your database table. After you have created the RVSqlServerDataSourceItem object, add it to the data source items collection.
revealView.onDataSourcesRequested = (callback) => {
    var sqlDataSource = new RVSqlServerDataSource();
    sqlDataSource.title = "My SQL Server";

    var sqlServerDsi = new RVSqlServerDataSourceItem(sqlDataSource);
    sqlServerDsi.id = "MySqlServerDatasourceItem";
    sqlServerDsi.title = "My SQL Server Item";

    callback(new RevealDataSources([sqlDataSource], [sqlServerDsi], false));
};
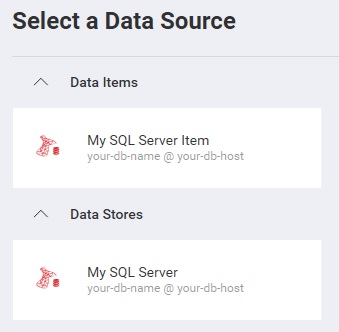
When the application runs, create a new Visualization and you will see the newly created MS SQL Server data source item listed in the "Select a Data Source" dialog.
On the Server
Step 1 - Create the data source and data source item on the client, but do not provide any connection information. Only provie an id, title, and/or subtitle.
const revealView = new RevealView("#revealView");
revealView.onDataSourcesRequested = (callback) => {

    var sqlServerDS = new RVSqlServerDataSource();
    sqlServerDS.id = "MySqlServerDataSource";
    sqlServerDS.title = "My Sql Server";

    var sqlServerDSI = new RVSqlServerDataSourceItem(sqlServerDS);
    sqlServerDSI.id = "MySqlServerDataSourceItem";
    sqlServerDSI.title = "My Sql Server Item";

    callback(new RevealDataSources([sqlDataSource], [sqlServerDSI], false));
};
Step 2 - Create the data source provider. In this example, we are providing connection information to connect to our MS SQL Server database that was defined on the client. To achieve this, we determine the type of the data source/item we are working with, and set the available properties on the object.
- ASP.NET
- Java
- Node.js
- Node.js - TS
public class DataSourceProvider : IRVDataSourceProvider
{
    public Task<RVDataSourceItem> ChangeDataSourceItemAsync(IRVUserContext userContext, string dashboardId, RVDataSourceItem dataSourceItem)
    {
        if (dataSourceItem is RVSqlServerDataSourceItem sqlServerDsi)
        {
            //required: update underlying data source
            ChangeDataSourceAsync(userContext, sqlServerDsi.DataSource);

            //only change the table if we have selected our data source item
            if (sqlServerDsi.Id == "MySqlServerDatasourceItem")
            {
                //set the table/view
                sqlServerDsi.Table = "Orders";
            }
        }
        return Task.FromResult(dataSourceItem);
    }

    public Task<RVDashboardDataSource> ChangeDataSourceAsync(IRVUserContext userContext, RVDashboardDataSource dataSource)
    {
        if (dataSource is RVSqlServerDataSource sqlDatasource)
        {
            sqlDatasource.Host = "10.0.0.20";
            sqlDatasource.Database = "Northwind";
            sqlDatasource.Schema = "dbo";
        }
        return Task.FromResult(dataSource);
    }
}
public class DataSourceProvider implements IRVDataSourceProvider {

    public RVDataSourceItem changeDataSourceItem(IRVUserContext userContext, String dashboardsID, RVDataSourceItem dataSourceItem) {

        if (dataSourceItem instanceof RVSqlServerDataSourceItem sqlServerDsi) {
            //required: update underlying data source
            changeDataSource(userContext, dataSourceItem.getDataSource());

            //only change the table if we have selected our custom data source item
            if (dataSourceItem.getId() == "MySqlServerDatasourceItem") {
                sqlServerDsi.setTable("Orders");
            }
        }
        return dataSourceItem;
    }

    public RVDashboardDataSource changeDataSource(IRVUserContext userContext, RVDashboardDataSource dataSource) {
        if (dataSource instanceof RVSqlServerDataSource sqlDatasource) {
            sqlDatasource.setHost("10.0.0.20");
            sqlDatasource.setDatabase("Northwind");
            sqlDatasource.setSchema("dbo");
        }
        return dataSource;
    }
}
const dataSourceItemProvider = async (userContext, dataSourceItem) => {
	if (dataSourceItem instanceof reveal.RVSqlServerDataSourceItem) {

		//required: update underlying data source
		dataSourceProvider(userContext, dataSourceItem.dataSource);

		//only change the table if we have selected our data source item
		if (dataSourceItem.id === "MySqlServerDatasourceItem") {
			dataSourceItem.table = "Orders";
		}
	}
	return dataSourceItem;
}

const dataSourceProvider = async (userContext, dataSource) => {
	if (dataSource instanceof reveal.RVSqlServerDataSource) {
		dataSource.host = "10.0.0.20";
		dataSource.database = "Northwind";
		dataSource.schema = "dbo";
	}
	return dataSource;
}
const dataSourceItemProvider = async (userContext: IRVUserContext | null, dataSourceItem: RVDataSourceItem) => {
	if (dataSourceItem instanceof RVSqlServerDataSourceItem) {

		//required: update underlying data source
		dataSourceProvider(userContext, dataSourceItem.dataSource);

		//only change the table if we have selected our data source item
		if (dataSourceItem.id === "MySqlServerDatasourceItem") {
			dataSourceItem.table = "Orders";
		}
	}
	return dataSourceItem;
}

const dataSourceProvider = async (userContext: IRVUserContext | null, dataSource: RVDashboardDataSource) => {
	if (dataSource instanceof RVSqlServerDataSource) {
		dataSource.host = "10.0.0.20";
		dataSource.database = "Northwind";
		dataSource.schema = "dbo";
	}
	return dataSource;
}
If you are using Microsoft Entra ID to authenticate against your SQL Server database, see the Microsoft Entra ID Authentication section for a complete example.
The source code to this sample can be found on GitHub