SQLite Data Source
Introduction
SQLite is a lightweight file-based relational database engine that stores data in a single database file. This topic explains how to connect to SQLite data sources in your Reveal application to visualize and analyze local application data.
Server Configuration
Installation
- ASP.NET
- Node.js
- Node.js - TS
- Java
Step 1 - Install the Reveal SQLite connector package.
For ASP.NET applications, you need to install a separate NuGet package to enable SQLite support:
dotnet add package Reveal.Sdk.Data.SQLite
Step 2 - Register the SQLite data source in your application.
builder.Services.AddControllers().AddReveal( builder =>
{
    builder.DataSources.RegisterSQLite();
});
For Node.js applications, the SQLite data source is already included in the main Reveal SDK package. No additional installation is required beyond the standard Reveal SDK setup.
For Node.js TypeScript applications, the SQLite data source is already included in the main Reveal SDK package. No additional installation is required beyond the standard Reveal SDK setup.
For Java applications, the SQLite data source is already included in the main Reveal SDK package. No additional installation is required beyond the standard Reveal SDK setup.
Connection Configuration
- ASP.NET
- Node.js
- Node.js - TS
- Java
// Create a data source provider
public class DataSourceProvider : IRVDataSourceProvider
{
    public async Task<RVDataSourceItem> ChangeDataSourceItemAsync(IRVUserContext userContext, string dashboardId, RVDataSourceItem dataSourceItem)
    {
        // Required: Update the underlying data source
        await ChangeDataSourceAsync(userContext, dataSourceItem.DataSource);

        if (dataSourceItem is RVSQLiteDataSourceItem sqliteItem)
        {
            // Configure specific item properties if needed
            if (sqliteItem.Id == "sqlite_customers")
            {
                sqliteItem.Table = "Customers";

                // Optional: override date inference for this item only
                // sqliteItem.DisableDateTypeInference = true;
            }
        }

        return dataSourceItem;
    }

    public Task<RVDashboardDataSource> ChangeDataSourceAsync(IRVUserContext userContext, RVDashboardDataSource dataSource)
    {
        if (dataSource is RVSQLiteDataSource sqliteDS)
        {
            // Configure connection properties
            sqliteDS.Database = "your-sqlite-database-path";

            // Optional: keep ISO date strings and Unix epoch values as raw types
            // sqliteDS.DisableDateTypeInference = true;
        }

        return Task.FromResult(dataSource);
    }
}
// Create data source providers
const dataSourceItemProvider = async (userContext, dataSourceItem) => {
    // Required: Update the underlying data source
    await dataSourceProvider(userContext, dataSourceItem.dataSource);

    if (dataSourceItem instanceof reveal.RVSQLiteDataSourceItem) {
        // Configure specific item properties if needed
        if (dataSourceItem.id === "sqlite_customers") {
            dataSourceItem.table = "Customers";

            // Optional: override date inference for this item only
            // dataSourceItem.disableDateTypeInference = true;
        }
    }

    return dataSourceItem;
}

const dataSourceProvider = async (userContext, dataSource) => {
    if (dataSource instanceof reveal.RVSQLiteDataSource) {
        // Configure connection properties
        dataSource.database = "your-sqlite-database-path";

        // Optional: keep ISO date strings and Unix epoch values as raw types
        // dataSource.disableDateTypeInference = true;
    }

    return dataSource;
}
// Create data source providers
const dataSourceItemProvider = async (userContext: IRVUserContext | null, dataSourceItem: RVDataSourceItem) => {
    // Required: Update the underlying data source
    await dataSourceProvider(userContext, dataSourceItem.dataSource);

    if (dataSourceItem instanceof RVSQLiteDataSourceItem) {
        // Configure specific item properties if needed
        if (dataSourceItem.id === "sqlite_customers") {
            dataSourceItem.table = "Customers";

            // Optional: override date inference for this item only
            // dataSourceItem.disableDateTypeInference = true;
        }
    }

    return dataSourceItem;
}

const dataSourceProvider = async (userContext: IRVUserContext | null, dataSource: RVDashboardDataSource) => {
    if (dataSource instanceof RVSQLiteDataSource) {
        // Configure connection properties
        dataSource.database = "your-sqlite-database-path";

        // Optional: keep ISO date strings and Unix epoch values as raw types
        // dataSource.disableDateTypeInference = true;
    }

    return dataSource;
}
// Create a data source provider
public class DataSourceProvider implements IRVDataSourceProvider {
    public RVDataSourceItem changeDataSourceItem(IRVUserContext userContext, String dashboardId, RVDataSourceItem dataSourceItem) {
        // Required: Update the underlying data source
        changeDataSource(userContext, dataSourceItem.getDataSource());

        if (dataSourceItem instanceof RVSQLiteDataSourceItem sqliteItem) {
            // Configure specific item properties if needed
            if ("sqlite_customers".equals(sqliteItem.getId())) {
                sqliteItem.setTable("Customers");

                // Optional: override date inference for this item only
                // sqliteItem.setDisableDateTypeInference(true);
            }
        }

        return dataSourceItem;
    }

    public RVDashboardDataSource changeDataSource(IRVUserContext userContext, RVDashboardDataSource dataSource) {
        if (dataSource instanceof RVSQLiteDataSource sqliteDS) {
            // Configure connection properties
            sqliteDS.setDatabase("your-sqlite-database-path");

            // Optional: keep ISO date strings and Unix epoch values as raw types
            // sqliteDS.setDisableDateTypeInference(true);
        }

        return dataSource;
    }
}
Database points to the SQLite database file, it accepts both absolute and relative paths. For .NET, the relative paths are resolved against AppContext.BaseDirectory. For Node.js and Java, the relative paths are resolved against the application's working directory.
DisableDateTypeInference is optional on both RVSQLiteDataSource and RVSQLiteDataSourceItem. When enabled, Reveal keeps SQLite date-like values as their raw string or numeric types instead of promoting them to date/datetime fields automatically.
Any changes made to the data source in the ChangeDataSourceAsync method are not carried over into the ChangeDataSourceItemAsync method. You must update the data source properties in both methods. We recommend calling the ChangeDataSourceAsync method within the ChangeDataSourceItemAsync method passing the data source item's underlying data source as the parameter as shown in the examples above.
Authentication
SQLite does not require authentication. Configure access on the server by setting the Database property to the SQLite file you want Reveal to query.
Client-Side Implementation
On the client side, you only need to specify basic properties like ID, title, and subtitle for the data source. The actual database file path and table selection happen on the server.
Creating Data Sources
Step 1 - Add an event handler for the RevealView.onDataSourcesRequested event.
const revealView = new RevealView("#revealView");
revealView.onDataSourcesRequested = (callback) => {
    // Add data source here
    callback(new RevealDataSources([], [], false));
};
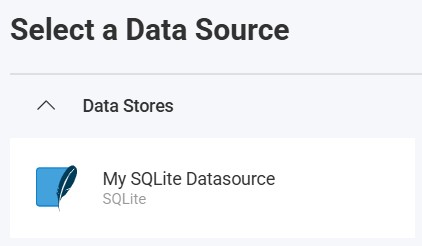
Step 2 - In the RevealView.onDataSourcesRequested event handler, create a new instance of the RVSQLiteDataSource object. Set the title and subtitle properties. After you have created the RVSQLiteDataSource object, add it to the data sources collection.
revealView.onDataSourcesRequested = (callback) => {
    const sqliteDS = new RVSQLiteDataSource();
    sqliteDS.id = "sqlite_ds";
    sqliteDS.title = "My SQLite Datasource";
    sqliteDS.subtitle = "SQLite";

    callback(new RevealDataSources([sqliteDS], [], false));
};
When the application runs, create a new Visualization and you will see the newly created SQLite data source listed in the "Select a Data Source" dialog.
Creating Data Source Items
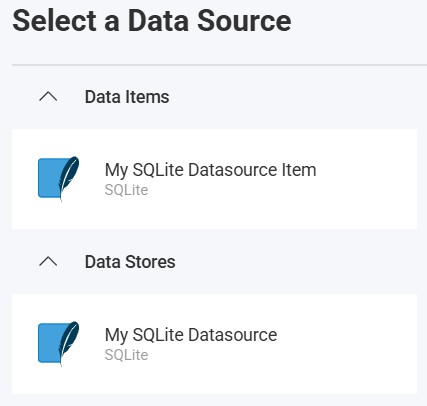
Data source items represent specific tables within your SQLite data source that users can select for visualization. On the client side, you only need to specify ID, title, and subtitle.
revealView.onDataSourcesRequested = (callback) => {
    // Create the data source
    const sqliteDS = new RVSQLiteDataSource();
    sqliteDS.id = "sqlite_ds";
    sqliteDS.title = "My SQLite Datasource";
    sqliteDS.subtitle = "SQLite";

    // Create a data source item
    const sqliteDSI = new RVSQLiteDataSourceItem(sqliteDS);
    sqliteDSI.id = "sqlite_dsi";
    sqliteDSI.title = "My SQLite Datasource Item";
    sqliteDSI.subtitle = "SQLite";

    callback(new RevealDataSources([sqliteDS], [sqliteDSI], false));
};
When the application runs, create a new Visualization and you will see the newly created SQLite data source item listed in the "Select a Data Source" dialog.
Additional Resources
API Reference
- ASP.NET
- Node.js
- RVSQLiteDataSource - Represents a SQLite data source
- RVSQLiteDataSourceItem - Represents a SQLite data source item
- RVSQLiteDataSource - Represents a SQLite data source
- RVSQLiteDataSourceItem - Represents a SQLite data source item